Powered by Blogger.
In my district, the focus on science and social studies has taken a back seat to reading and math. Like so far back that it's basically not even in the car anymore. The pendulum has swung SO far over to that side that it's really hard to cope. I miss teaching science and social studies! The kids miss it! The little bit they get in the reading series isn't nearly enough. So while I wait for that freakin pendulum to start swinging back, I will supplement with at least a little something more. 

A few years ago I created these One Sheet Wonders. I was actually inspired by children's menus. I was also guided by my desire to get as much as I can on one page and make it worth printing. This set is the one I'm currently using, so I thought I'd share it a bit with you. This set covers habitats and even though it's a supplemental material, it really does cover a lot!


The set includes a page for the ocean, desert, rainforest, polar regions, and the wetlands. Each page has a variety of activities to keep the kids engaged and interested. Some consistency among pages helps build confidence. I snuck in some handwriting practice too! My first graders can definitely use the manuscript practice and have fun with the "fancy" writing too. 


I included a set of maps that you can print and post, leave at a center, or project when you're using the page. I love to have my kids use books and other resources, but with these maps you know they'll find exactly what they need to work on the page. 


I included a cover page in case you want to print all of the habitat pages as a work packet to use over time.


See what other teachers are saying:

This page of teaching ideas is included in the download, but here's a peek:

If you're interested, you can grab this set on TpT HERE

I also have a set for Science, which you can find HERE.


And a Freebie for Earth Day HERE.


I hope you find these as useful as I do! Just a reminder, I started a You Tube channel! It's a mish mash right now, as I'm still finding my way, but so far it's just mostly me being me. I'd love for you to come visit me at Denise Speaks. 

Happy Teaching!


We're working with a new reading series and I have thoughts. Sometimes I'm so completely overwhelmed by the amount of resources that accompany the series and sometimes I'm scratching my head and searching my files because they don't provide some of the most basic activities. Sound familiar? I'm on a mission to close the gaps. I need to add some things that my kids need while also keeping my pledge of "fidelity" to the series. It feels like an arranged marriage, but here we are...

So, what I find myself looking for is easy to implement center activities that are not overwhelming, can actually be completed independently, and provide practice for the skill set forth in the series. One way I've accomplished this is my word work booklet that I blogged about here. Another are these Chunk-It Games. These games are so easy to put together and really easy for the kids to figure out. Just print and cut, laminate in there if you like, and put them in a container. I like these double sided ones from Sistema, but obviously any container will work. I like the 2 compartments, but even one sandwich sized tub or even a baggie are just fine. 


I love the idea of teaching the kids how to play a game or complete an activity that I can just change up slightly to make it fresh and exciting but the kids can rely on the independence they have from learning the basic structure of the activity. So this set of Chunk It Games fall into this exact category. The basic idea is that the kids turn over two cards, one with the blend and one with the rest of the word, they read it and decide if it's an actual word. Each game comes with the word cards, teacher notes, and ideas for classroom use.


I've created three games so far, L, S, and R blends. They're working really well for my kids, so be on the lookout for more if these seem like something you can use. Each game is $2.25 but I just bundled all three for $4.75. You can snag that bundle here.


This product may look simple, but it has been two years in the making. I created it for my students and have tested, revised, reworked, and re-tested over and over and I finally have it just right. It's become a staple in my classroom and has made center time SO MUCH EASIER. Let me tell you, I was struggling with centers in first grade. Mixing high expectations, "rigor" (don't get me started...) and kids with very little independence, below minimal reading levels, and pandemic babies who missed out on a lot of foundational skills left me frustrated to say the least. Not that this little booklet was the magical answer to all of my prayers, but it did help. A lot!


I choose 4-5 activities each week and my kids finish one page per day. My first graders and I completed each activity together over a couple of weeks before they saw it in a center. We did this instead of traditional morning work for a while so the kids could get the hang of each activity. I added a little clue, hint, or reminder at the top of each page and I really focused on that during the instruction and practice phase. I really think that helped them with independence when they saw the activities on their own.


When I taught second grade, they were able to complete most of the activities without much direct instruction. It all depends on your students.


This booklet is easy on paper and ink, fast to set up, lasts an entire week or longer, allows for differentiation, and sets up students for success and independence. The activities can be used with any word list, combined with any reading series or phonics list. It currently works with lists of 10 words, but if there is an interest I can make it suit longer lists as well.

Choose from 15 different activities that follow a familiar format but are just different enough to keep the kids interested and engaged.


This little booklet would also be great for homework or as enrichment work for your early finishers. Consider letting them keep a page in their notebook of difficult or interesting words and when they have a group of ten, they can practice them in a booklet!


Click HERE to see the booklet on TpT. It's on sale for half price through January 1st!

I have taken a HUGE step in my social media adventures. Something I never thought I would do. I've jumped into video creation with both feet! I have always been someone who avoids the camera like my life depends on it. I have never liked seeing myself in pictures and I definitely do not enjoy hearing the sound of my own voice or watching myself on video. BUT I'm doing it anyway. I'm finding that the more videos I create, the more self-accepting I'm becoming. Now, I really don't know what I'm doing. I'm filming on my phone. The lighting usually isn't great. Wow, that's really making you want to watch, huh?

Whether you're a first year teacher or a veteran, those first few minutes of a new school year can be a whirlwind! I wrote a post a while back with some other ideas for those first few minutes, including things like Play-Doh and puzzles, which you can read here

I know that sometimes your best laid plans of exciting hands-on fun can sometimes go off the rails real fast. One or two kids having a really hard time separating from their grown-ups, last minute new students, weird weather, talkative parents, late busses - they can all throw your fairy tale first day for a loop. I've been teaching for 28 years and there have been very few of those fairy tale experiences. That doesn't mean I've stopped trying though! But what I've learned to do is have a back up plan. Good old fashioned paper-pencil-crayon tasks that the kids can handle all by themselves or with the collaboration of their new friends. So for this, I created Welcome Back Packs for second and third grade, and now that I'm teaching first grade, I had to create one that I can use. I'm still deciding how I feel about teaching first, but after three years, I feel a lot more comfortable creating materials for my little firsties. Not gonna lie, I like being able to say "firsties".  I never really found a cute nickname for my second graders. (Gotta take those small victories wherever you find them. lol)  Link to Second Grade, Link to Third Grade.

So these packs are designed for the average kid to be able to handle without a lot of instruction or assistance from the teacher. That way when you are talking to parents and dealing with upset kids, collecting supplies, the rest of the class isn't just sitting and becoming restless or wandering the room. Each student will find a pack on their desk and a note on the board welcomes them and lets them know they can work on any page while we're getting settled.  The second and third grade packs have a lot of activities designed around the words two and three, to amp up the excitement of a new grade. 


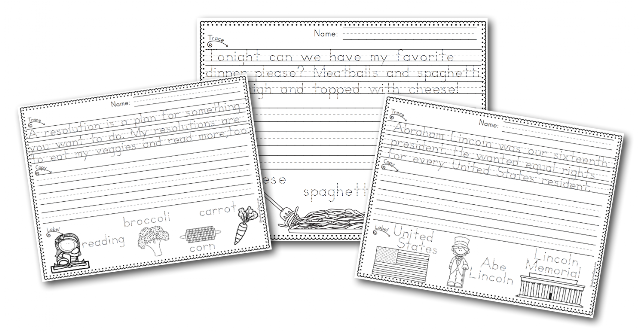
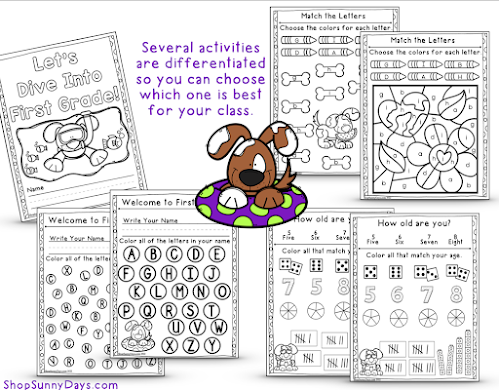
Now for first grade, it's a whole different ballgame. Incoming first graders are basically Kindergarteners and it's WILD how different they all are. So for first grade I made differentiated versions of some of the pages. So, for example I wouldn't print out both of these pages, I'd choose the one that seems like the best fit for my incoming students. We're able to see some data on our kids before the first day. If that's not the case for you, I'd say go with the "easier" version and maybe make a few copies of the harder version and have them handy to give to kids who show the need for a challenge. Link to First Grade.

Same with these age pages. I consulted friends in Kindergarten and my first grade friends and got very mixed answers. If you think your kids can handle the forms of numbers mixed up choose that page, if not, then the page with the numbers in order may be better. 

You know, back to that "fairy tale" hands on  magical moment of collaboration and hands-on engagement from the first moment of the first day - some kids find that overwhelming. Lots of kids find comfort in the familiar task of sitting down and coloring, practicing their name, finding success in easy math tasks. This doesn't mean that I won't move those kids into the more collaborative tasks, but we're talking about the first moment that these little kids walk into a new environment with new people for the first time. It can be scary! Having something they know how to do gives them comfort in purpose. 


I always have some instrumental music on in the background when the kids enter the room for the first day. Usually they start working quietly and then they start chatting with new friends and a nice little happy hum starts to take over the classroom. This gives me some time to individually welcome each child, help them put their supplies away, handle tasks like attendance and urgent messages. We have to tag each kid according to their dismissal and figure out lunches and all that fun stuff. And these simple little packs help me do all that. Seems too good to be true, but it totally is my first day lifeline. Once everything gets settled, we usually gather on the carpet for a book and a fun introduction and the first day goes on as planned. I can walk through what a first day looks like in my room if anyone would like to hear about that.  So then what happens to the packet? Well, we put them in our cubbies or seat sacks and it becomes my lifeline for the next few days. Any time a situation arises that needs my attention, or we have a weird few minutes, a potty accident, or a special gets cancelled, or a lesson goes downhill fast, we can pull out our Welcome Back Pack and work a bit with our friends. 

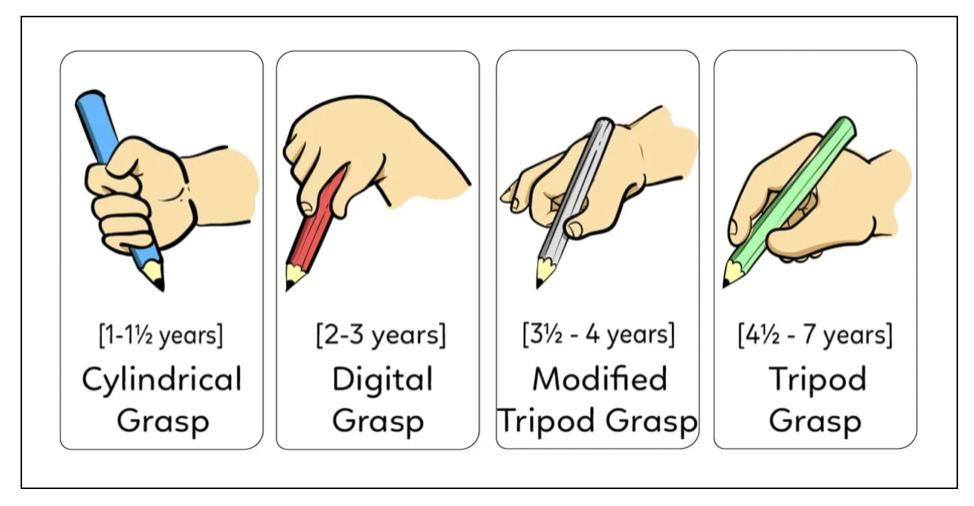
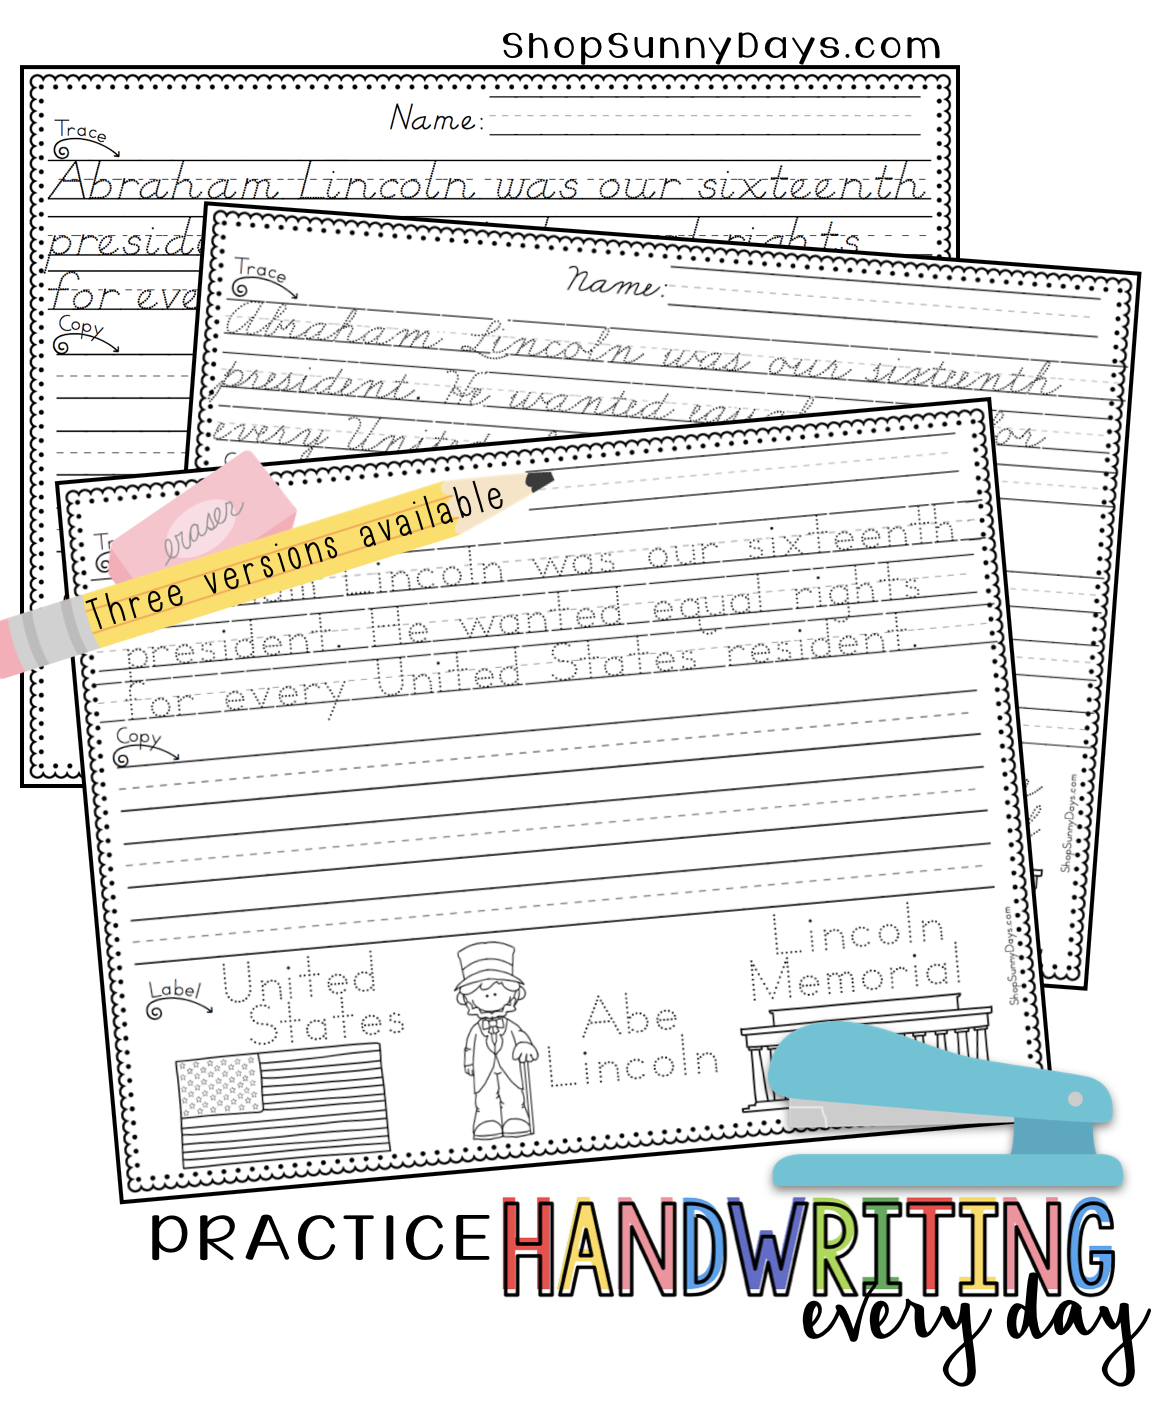
What do I do with it after it's finished?  I flip through it with a student when they tell me they're done. It gives me that very first snapshot of a few things: effort, handwriting, following directions, basic math, coloring, and neatness. If everything seems on level with no glaring concerns, I let the kids choose a sticker for it and they take it home. I do not grade every single page or even make a mark on the paper. Now, if I see something concerning I will keep the pack, write some notes on stickies when I have a moment and then take a picture of the pages before removing the stickie notes and letting that child also choose a sticker and take home their work. Notes are very minimal, such as "handwriting - fine motor?". Just a way for me to make a note to keep an eye on any potential challenges. I don't put all my faith in this packet, it's just a very superficial first glimpse. 

However you start your first day, I hope it's amazing and only gets better from there!


I've found myself become rather passionate about two things - handwriting and spelling. Two things that are so insanely important, but seem to get pushed to the side way too often. I'll talk more about spelling soon, but you can see what I use for that in this post. As I mentioned in this post, I couldn't find what I was looking for in terms of handwriting practice, so I created a pack to use with my kids. Today I'd like to share a bit about what else you can do to help your students become more legible writers. 

The number one area to tackle is fine motor strength. If your students don't have the dexterity to properly grip the pencil, it's an uphill battle. It's hard to find time for this practice in the classroom, but it will probably help more than trying to force more pencil and paper tasks that are illegible. Consider involving parents in home practice. Anything that gets their little hands moving in purposeful tasks is helpful. Suggested exercises include using Play Do or clay, snapping legos together, stringing beads, using tweezers to move small objects from one dish to another, and squeezing stress balls, cotton balls, or pom poms. Everyday activities like cutting and coloring will also help build their hand strength. 


Size Matters! Pencil size, of course. I interviewed an occupational therapist for advice and she recommends that pencils be kept on the short size, about 6 inches, about and inch and a half shorter than most standard pencils. I found this to be recommended in several other articles regarding children learning how to write. Some suggest even shorter, just enough room for the child to execute the perfect "tripod grasp".


The graphic above, credited to Flinto, clearly shows the natural progression most children take on their way to the tripod grasp. After some experience holding writing devices from crayons to fatty pencils to regular pencils, they will hopefully be able to use their index, thumb and middle finger to hold the pencil in a tripod grip a few centimeters above the sharpened edge of the pencil. I know some people can write beautifully holding their pencil in all kinds of funky ways. I've seen it myself. This is just what is recommended and may be helpful to those struggling. 


I'm sharing some helpful items that were recommended by the occupational therapist I spoke to as well as tried and true products I've used in my own classroom. Especially notice the pencil grip. The wormlike foam tube we all know and love is not going to help if students are struggling with pencil grasp, although it may help students who just like the cushy feeling. 

Teacher's Favorite Pencils! The amazing Ticonderoga.  They've earned that reputation for a reason. They sharpen beautifully, they don't have plastic designs that clog up the sharpener, and you'll never get one of those weird ones that never seem to sharpen or have broken led inside. 

Good Erasers. Nothing beats the frustration of a kid ripping through their paper with a crappy eraser. No cutesy character shaped erasers. Did you know there are five main types of erasers? One of the lesser known, but amazing ones is a foam eraser. It's so highly rated for clean erasures of pencil from paper with limited damage to the paper. You can see them here. They are a bit pricey, so if you get any discretionary funds or parent donations, they are well worth it. 

Pencil Grips. Forget the foam tubes that slip over the end of the pencil, unless it's just for comfort. If you have kids who are really struggling, try grips like the ones below. This was something else my occupational therapist friend recommended.  Link to the Claw Grip HERE and the JuneLsy Silicone Grip HERE


If asking a kid to put pencil to paper sometimes backfires, try to practice in other ways. Fill a ziplock bag with some slime and have kids hold a pencil eraser-side down to practice writing letters. Try writing with their fingers on steamy shower doors (that's a home practice obviously), have them dip their fingers in water and write on chalkboards or sidewalks, try sidewalk chalk, use crayons, markers, whatever it takes to get them interested before the paper practice or even in between paper practice sessions. 

When you are ready for that paper practice, I welcome you to try my handwriting practice pack on TpT, which you can read all about in my last blog post HERE or find directly on TpT HERE.


Fitting in handwriting practice is becoming more and more difficult due to the forty bajillion other things that we have to fit in each day, but it is really important. Yes, the world is going digital, but does that mean we are going to just ignore handwriting and raise a generation of kids who can't write legibly? I sure hope not.

I've been searching for something to integrate into my routine to help strengthen handwriting, but couldn't find quite what I was looking for. So I made my own! The practice pack I've created has 180 pages of practice that all follow the same format: a short seasonal or content based rhyme to trace, then copy, then label and color. Coloring is optional, of course, but it might be motivating for some kids and make the practice seem like less of a chore.

I used a special licensed font to create this pack, so all of the letters should match the Zaner-Bloser style of manuscript handwriting.  After several requests, I've also created two additional versions: Modern Manuscript (similar to D'Nealian) and now Cursive!

Here's a page from the first few days of school. You can see how the rhyming words are right at the end of each line, making it really easy for the kids to read and find the rhymes.


Now here's a page from further in the year. You can see that because we're now using longer sentences, the rhyming words don't appear right at the end of the line. This is a great opportunity to remind the kids to read through to the punctuation, not to stop at the end of the line. To reinforce this concept, consider having them use highlighters to identify the rhymes. I'm planning on modeling this with the kids for a bit until they pick it up on their own.

I specifically made these practice pages rhyme because I found that my kids really seemed to be having some difficulty with the concept over the past couple of years. Now this can be another way to work on that skill. You can also work in some mini-lessons on word families and spelling - see how wear and hair are the rhymes here but are not spelled with the same pattern? Little opportunities for a word work discussion are present throughout the pack.

I included a cover page for each month just in case you want to print out a little pack for each student for the month instead of keeping track of and passing out individual pages each day.
Get all 180 days of practice and cover pages for each month for just 12.50. 
(it's actually on sale for $9.99 right now through July 31, 2022)
Click HERE to see it on TpT.
This year Im going to start off by using these handwriting activities for my whole class for a few minutes each day. I'm not sure what my schedule looks like yet, I'm thinking maybe when we come back in from lunch or those awkward few minutes that you always have somewhere in your schedule. As the year goes on, I may just move to having the kids who really need the practice work on the pages, or even just send them home with a few. It all depends on the needs of the kids. How do you think you might incorporate some handwriting practice this year?

I'll be sharing some more ways that I use this for more than just handwriting really soon. 

Happy Handwriting!


Back to Top